Multisensory Monday: Listening Centers
Posted by Brainspring on 16th Feb 2015
 Hi everyone,
Welcome to Multisensory Monday! I’m bringing you another idea from on the road…well, on the plane to be exact, so I had to get creative and come up with an idea that doesn’t need any supplies. Thankfully a few days ago, another RLAC Instructor, Tammi, gave me a great idea by suggesting that teachers record their own audio to use for listening center activities.
By recording your own audio, you can differentiate instruction and have students working independently on things you used to think had to be done in a teacher-led small group. Just make sure that you gave students the initial instruction in a lesson directed by you. Listening centers should be used to practice and reinforce skills that you already introduced.
Think of the possibilities!
- You can turn any book or chapter, fiction or non-fiction, into a listening center.
- You can record phonological awareness activities for struggling students to do while you work with the rest of the class.
- You can add comprehension tips and questions for students as they listen to a text.
- You can make an audio version of any text for students with dyslexia. Teach parents how they can do the same!
- You can have students work on building fluency by listening to you read a passage and then trying it out on their own.
Put classroom or parent volunteers to good use by having them make recordings. They can even do it from home!
How to Record: Step-by-Step
Don’t be scared. This is really easy, even for those who don’t think they are tech saavy. If you have a smartphone (like almost everyone seems to), recording your own audio is a breeze.
First, you’ll need to install an audio recording app. There are a bunch of free ones out there. I personally like VOICE RECORDER (FREE). It’s straightforward, easy-to-use, has everything you need and none of what you don’t. In case you need it, here are step-by-step directions to get the app:
 Click the blue “App Store” icon on your iPhone.
- Go to “Search” and type in “Voice Recorder”.
- Scroll to “Voice Recorder (FREE) and press “Get”.
- Then press “Install” and enter your password.
- When it’s done installing, press “Open”. Volia, you’re ready to go.
Now you can easily record your own audio, anytime, anywhere. You could even make a recording in the car on the way to school in a pinch.
- Open the app.
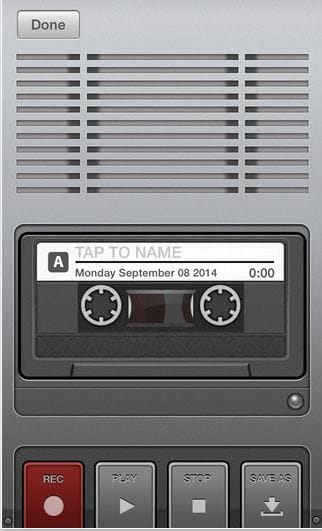
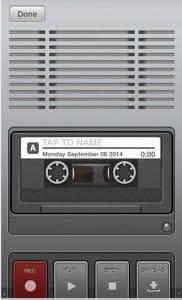 Press the red circle at the bottom to open the recording window. It looks just like a tape player, no complicated buttons to mess with.
- Press the red REC button to start recording and then STOP when you’re done.
- Press SAVE AS. Change the Filename for your recording and then press Save.
- Now you should be back on the homepage. Press Edit and then press the circle that appears next to your recording to select it.
- Press the Share button at the bottom to email the recording to yourself, so you can open and play the file from any computer.
Then simply go to your email and download the file to the device the students will be using at the center. If you want to get a little more complicated, you can download the file and burn it to a CD as well.
Here is a short sample I recorded that could be used to practice rhyming skills.
Please share what you want to record for your own listening centers!
Remember to like us on FB, follow us on Twitter and share us with your friends.